Writing down Integration Tests — help improve efficiency & stability of product while the app modules grows. Apple provides UI Tests for the same — which adheres to black box testing.
This article is not about — how to write UITests — We assume you already know that. This article is about —
Executing UI Tests on different ENV — DEV / STAGING / PROD
Configurable Data Set for different ENV
Jenkins Job for executing UI Tests on different ENV
Lets get started!!
Executing UI Tests on different ENV — DEV / STAGING / PROD
We already have different XCode Schemes for running different ENV on App.
- Enable UI Tests on respective schemes
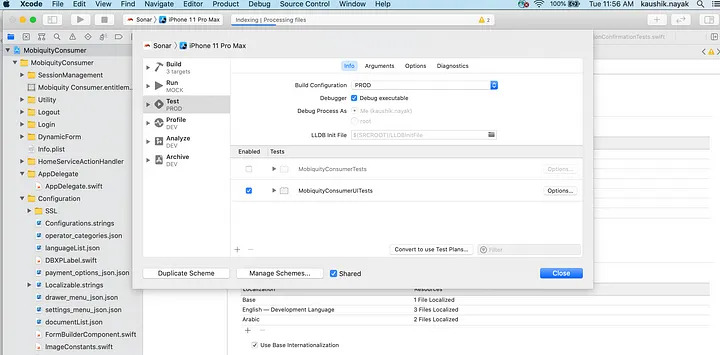
- From Scheme List, we have to select a scheme and click on edit scheme.
- We will get a pop-up, in pop-up left side we have same option to run and build application, one option is Test is there so we have to select test from and then from right side click on info title text.
- After click on info title we will get same configuration, in that one drop build configuration drop down. from Drop down select scheme on which want to execute UITest cases. Then click on close

Now when you run UITests on respective scheme — Tests will start executing on respective ENV
Configurable Data Set for different ENV
For each ENV — we need to have different data set for executing Tests.
For data configurability we have 3 steps:
- SetUp of data plist for Development/ Staging/ Production environments
- Reading respective ENV plist
- Populating Data Set for UITests
- SetUp of data plist for Development/ Staging/ Production/ Mock environments
For creation of plist we have to click on UITests folder from project hierarchy then click on new file, we will See pop-up of all files, select property list and click on next and create.
Create plist for respective ENV

In plist file – key value pair — key should be as you are going to use in Model class as CodingKeys
Create Model Class as per Data plist — which will parse respective ENV plist file
Reading respective ENV plist
Create a new swift file in UI Tests target and set up as per below.
DEV / MOCK / UAT / PVG / PROD are XCode Configurations — defined in project settings

Populating Data Set for UITests
Its always Best Practice of have a BaseUITests (extending XCUITest) class — where we define our reusable methods / data.
- Define a class level variable userDataDaoObject
- Add below method to populate data set

Using Data Set — plist — in UI Tests
Now in each of UI Tests class — extend from BaseUITests. In every test method OR in setup method of Tests Classes — call
super.setUpUser()
and start accessing parent class object — userDataDaoObject — in Required Tests for populating data.
Jenkins Job for executing UI Tests on different ENV
Create a new Project in Jenkins.
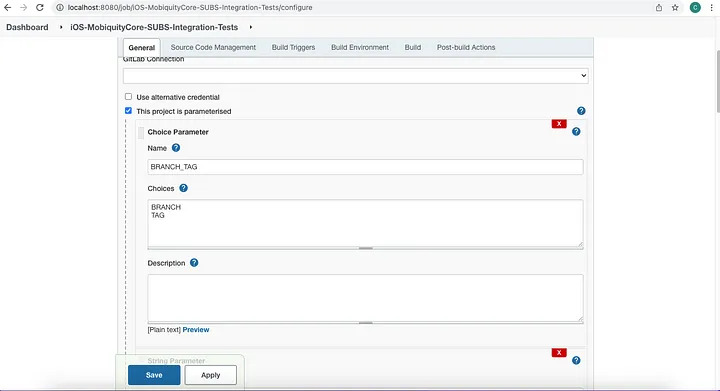
After creation of project — configuration screen will be shown. In General configurations, we will see a Check box for whether project is parametrised or not so we will select that because we want to run our Test Cases from different environments and branches.
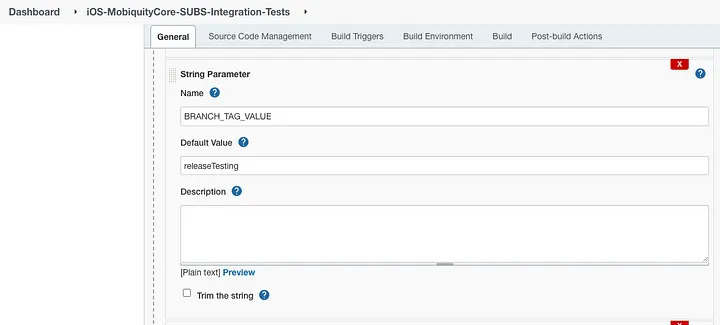
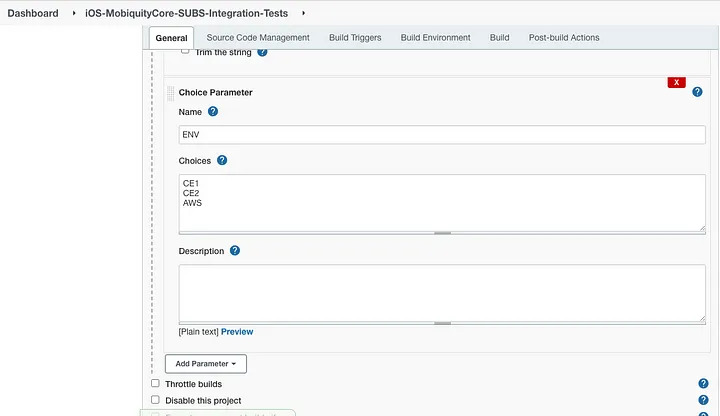
So for running test cases from Tag or Branch and for ENV we have to add drop downs / input fields


In Build Script Section — setup as per below —
#!/bin/bash -l
set +x
set -e
export PATH=$PATH:/Applications/Xcode.app/Contents/Applications/Application\ Loader.app/Contents/Frameworks/ITunesSoftwareService.framework/Support/
# Cleanup workspace from previous build. We should use this for a cleaner approach: https://wiki.jenkins.io/display/JENKINS/Workspace+Cleanup+Plugin
rm -rf $WORKSPACE;mkdir $WORKSPACE || true
cd $WORKSPACE
git_url=”<PROJECT_GIT_URL>”
# Check if default configuration of Release has to be used
configuration=${CONFIGURATION}
# Clone project repo and
url=${git_url#*//}
git clone http://<CREDENTIALS>@${url} .
if [ “${BRANCH_TAG}” == “TAG” ]
then
git checkout tags/${BRANCH_TAG_VALUE}
elif [ “${BRANCH_TAG}” == “BRANCH” ]
then
git checkout “${BRANCH_TAG_VALUE}”
fi
if [ “${ENV}” == “CE1″ ]
then
SCHEME=”DEV” # XCODE SCHEME NAME of yours DEV ENV
elif [ “${ENV}” == “CE2″ ]
then
SCHEME=”UAT” # XCODE SCHEME NAME of yours UAT ENV
elif [ “${ENV}” == “AWS” ]
then
SCHEME=”PROD” # XCODE SCHEME NAME of yours PROD ENV
fi
# Pod Install
rm -rf Pods
rm -rf Podfile.lock
pod install
workspace=$(ls | grep xcworkspace | awk -F.xcworkspace ‘{print $1}’)
xcodebuild -quiet clean test -workspace ${workspace}.xcworkspace -scheme “${SCHEME}” -destination ‘platform=iOS Simulator,name=iPhone 11’ -enableCodeCoverage YES -derivedDataPath Build/
Save & Apply the changes. And Build your Jekins Job!!
Voila!! You are good to go and automate your Integration Tests


